


It’s 2025, and do you really still have to deal with paper cards that always get lost or thrown away? You might be, and that’s fine, but there’s a better, definitely smarter way to network in this world that is becoming more and more digital: the NFC business card. It’s not just about being cool; it’s also about being efficient, using a sustainable method, and making a lasting, even impressive, first impression. A truly seamless experience.
You probably use Near Field Communication (NFC) technology every day for things like contactless payments or getting on public transportation, a familiarity that’s often just subconscious. It has quietly changed the simple business card. A quick tap of your card against a client’s smartphone instantly sends them your whole contact profile, website, social media, or any other digital presence you want to share. It’s really a magical moment, a tangible link to your digital self.
There are a lot of great NFC cards that you can buy that were made by professionals, of course, but nothing compares to the satisfaction and low cost of making one yourself from scratch. This longer, more detailed guide will show you how to do everything, from choosing the tiny chip that stores the data to the very last step of programming it. Think of this as your own personal plan for becoming a master of digital networking.
Important Tools and Supplies for Your NFC Project
So, you’ve chosen to do it yourself? Great! You need to gather a few important parts before you start designing and coding. This isn’t a very expensive project, which is why it’s so appealing, but getting the right components is absolutely crucial, especially that little chip that holds all the information.
Picking the Right NFC Chip: NTAG Series Selection
The NFC tag is the most important, the very core, of your new smart business card. These tags are basically passive electronic chips with a tiny antenna coil; they don’t have their own power source; rather, they get power and are read from the electromagnetic field that a nearby smartphone, which acts as the reader, generates.
- NFC Sticker Tags/Inlays: These are flat adhesive stickers with an antenna and a chip on them. These are precisely what you’ll use to make your own card. They are thin enough, thank goodness, to fit under a printed layer or stick discreetly to the back of a regular card without being seen.
- The Type of Chip: NTAG213 vs. NTAG215
- NTAG213: This chip is the most common and least expensive, offering 144 bytes of usable memory. That’s enough for a short website address (a link to a dedicated digital profile, for example) or a very simple contact record. For most simple uses, like linking to a single URL, this chip is perfectly adequate, actually.
- NTAG215: Now, if you want something much stronger, like a card that stores a full vCard (a digital contact file) directly on the chip, you’ll definitely need the 504 bytes of usable memory that the NTAG215 provides. It costs a little more, yes, but it gives you a lot more space for data and allows for more complex encoding.
- Tip for Data Management: The NTAG213 is fine if you’re linking to a hosted profile (a URL) because the URL is short. However, if you want the contact information to show up right away, instantly, without requiring an internet connection to download a file, go with the NTAG215 for direct vCard storage on the chip.
Physical Card Components and Aesthetics
The physical medium is where you make the final choice about how it looks, which is key to your branding.
- Blank Cards/Stock: You could use thick, high-quality cardstock for a classic, paper-based feel, or a much stronger, more expensive PVC plastic card that you can print on with a compatible printer. The most important thing here, the absolute priority, is that the material is strong enough not to tear and doesn’t completely block the NFC signal.
- A Good Printer (or a Professional Service): If you’re not just putting the NFC tag on an existing card, you’ll need a way to print your design. For cardstock, a good inkjet or laser printer will suffice, but for that professional, smudge-proof look on PVC, you might, and I mean might, have to send your design to a special printing service.
- Adhesive: If you’re using NFC stickers and separate card stock, you’ll need a strong, non-bulky adhesive to keep the sticker in place if it isn’t already sticky. You might even want a thin, protective layer, something like a clear sticker, to cover the tag on the back of the card.
Gear for Programming: Your Smartphone is the Key
This is the surprisingly simple part! You probably already have what you need, which is great.
- NFC-Enabled Smartphone: Most new Android and iPhones (iPhone 7 and later, running iOS 13 or later) can handle both reading and writing NFC. This is your programmer, your essential tool.
- NFC Programming App: This is the software that translates your contact information into a form that the chip can read. Many people like and find it easy to use apps like NFC Tools (for iOS and Android) or TagWriter by NXP (for Android). They give you the control you need.
Designing the Perfect Digital Gateway: Where Form Meets Function
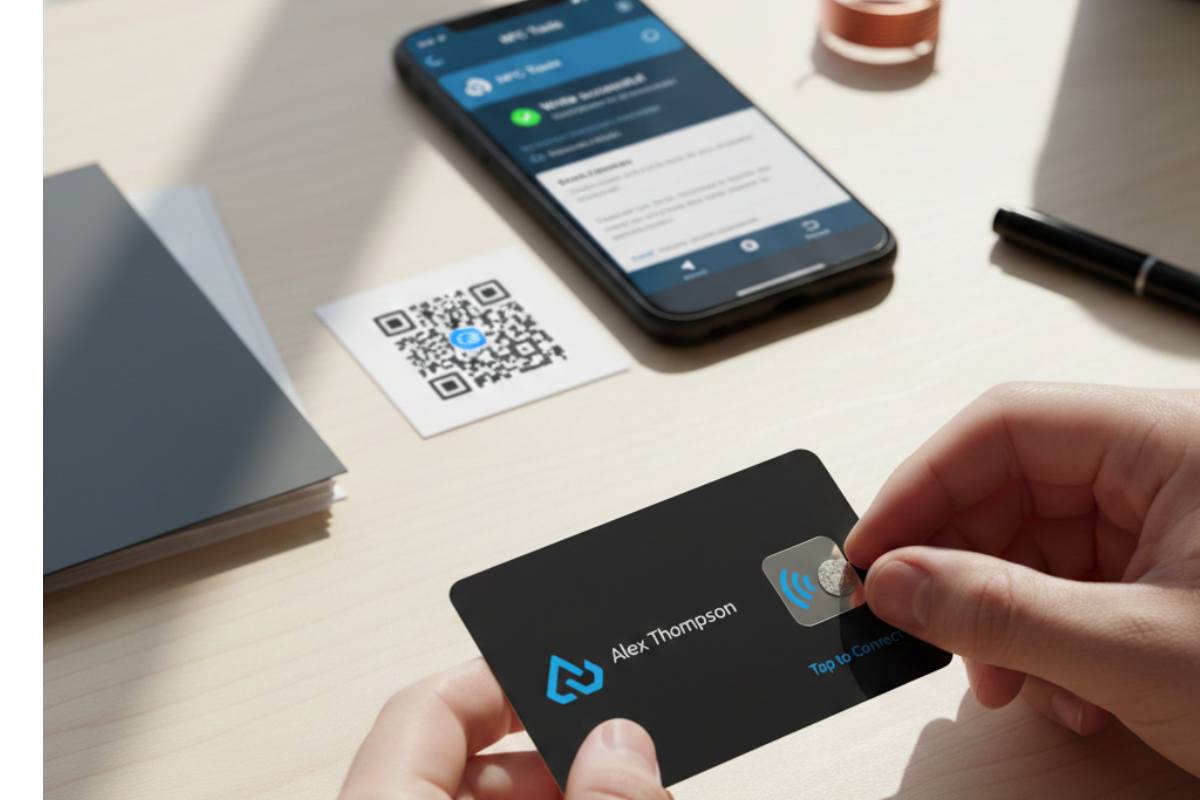
The whole point of this project is that a beautiful business card is useless if the person who gets it loses it, which is the inevitable fate of most paper cards. But your physical card is still very important; it’s the visual anchor, the trigger, that tells them to “Tap Here.”
The Visual Design: Giving It a Professional Look
Your design needs to strike a careful balance: visually appealing, on-brand, and functionally clear. Don’t rush the design; it’s what shows the world who you are, after all.
- Use Design Software: Tools like Canva, Adobe Illustrator, or even a basic graphics editor can be used. Pick one that you like and make sure the final file is a high-resolution one (at least 300 DPI) that can be printed without fuzziness.
- Important Parts to Include:
- Branding: People should be able to easily recognize your logo, company name, and color scheme.
- Basic Information: Name, job title, and maybe one or two crucial ways to get in touch (like an email address). The NFC chip takes care of most of the data, so please keep the printed text minimal.
- A Call to Action: This is very important! You absolutely need to give people clear instructions. A small NFC icon and text like “Tap to Save Contact” or “Tap for My Digital Profile” make the technology clear, which is tremendously helpful when networking with someone new.
- Placement is Important: If you’re using an NFC sticker, you must leave a clear, dedicated space on the back of your card for the tag. Printing directly over the chip area can hurt the card, and it definitely gets in the way of the call to action, which, as noted, is super important.
Making the Digital Profile (The End Point Strategy)
You need to know exactly what information you’re really sharing before you write to the chip. This is where you leverage the power of the internet and a single, unified link.
- The V-Card (Virtual Contact File): This is the standard digital file type for sharing contact information, and it’s super handy. To get the most out of this for compatibility, you’d make one, upload it to a cloud service (like Google Drive or a dedicated digital profile service), and then get a direct, shareable URL link to that file.
- A quick clarification on URLs: While you can encode the vCard directly onto an NTAG215 chip, sometimes operating systems, especially older versions of iOS, don’t automatically know how to handle the direct vCard data via NFC. A direct URL link, on the other hand, is universally understood and makes the user’s phone download or open the contact file right away; it’s just smoother.
- A Landing Page: A lot of professionals choose to have just one nice landing page (also called a “link-in-bio” or “digital profile”) that has all of their links: LinkedIn, portfolio, main website, phone number, and more. The NFC chip then only needs to store one short URL, which is much easier and, crucially, lets you change your contact information without ever having to reprogram the card.
The Programming Phase: Putting Data on the Chip
This is the moment of truth when you turn a simple piece of plastic or paper into a powerful piece of smart technology. Believe it or not, it’s very easy, and you’ll feel quite clever doing it.
The Process of Encoding Step by Step
For this demonstration, we’ll use a well-known, easy-to-find app like NFC Tools, but honestly, the steps are almost the same for other popular apps, too.
- Get Your Data Record Ready
- Open your NFC programming app. You’re looking for a part that usually says “Write” or something similar.
- Choose “Add a Record”: A list of data types you can write to the tag will appear. Choose “URL/URI” or “Website” because, as we discussed, this is the best and most flexible choice for wide compatibility.
- Paste Your Link: Carefully paste the long URL of your digital profile or your direct vCard download link. If possible, use a service like Bit.ly to shorten the link, as it saves memory on the chip. Check for typos again, meticulously; they do happen!
- Confirm: Click “OK” or “Done” to add this record to the app’s writing queue.
- Put the Data in Writing
- This step only takes a few seconds. Make sure NFC is turned on on your phone. On most Androids, you can find it in the settings, while on iPhones, it’s generally always active in the background for apps.
- Start Writing: Tap the final “Write” button in the app. The app will ask you, “Ready to Scan?”
- The Tap: Lightly touch the NFC reader area of your phone with your NFC tag or sticker. On most Androids, this is close to the middle back of the phone. For iPhones, it’s typically at the very top edge.
- Confirmation: Almost right away, you’ll hear a beep or see a message that says, “Write successful.” If you get an error, try moving the card a little bit; the alignment of the antenna is everything in this process, so play with the position a bit.
- Locking the Tag (Suggested for Security)
- You should lock the tag once you are completely sure that it has the correct, verified information.
- Choose “Other” or “Lock Tag”: Most programming apps have a permanent “Lock” function.
- Why Lock It? Locking the tag stops it from being overwritten by mistake or on purpose. Once locked, the data is kept in a permanent, read-only state. You absolutely need this for a business card so that no one else can program over your link. Be careful, though: this is a one-way street; once the chip is locked, it can’t be reprogrammed.
Compatibility and the Essential QR Code Backup
You have your card, it’s lovely, and it taps perfectly. So you think you’re finished? Almost there. A good reporter, and certainly a smart networker, always plans for the worst, or at least the non-standard phone.
Making Sure It Works on All Platforms
NFC is now a widely used standard, but you might still run into a few edge cases, right? It happens.
- Android: Generally, Android phones have automatically read NFC tags for years, and most will immediately do what you told them to do (like open a website or save a contact); it’s very reliable.
- iPhone: iPhones can read NFC tags, but older models (before the iPhone XS/XR) often needed a separate NFC reader app to be opened to start the scan. However, this is becoming less common as newer iOS versions improve background NFC reading. Still, it’s important to know that not every phone will work the exact same way.
The Ultimate Safety Net: The QR Code
“What about that one person who has an old phone, or maybe their NFC antenna is just acting funny, or they don’t know what it is?” It’s a great question, which is why a QR code is your most important piece of “legacy” support, honestly.
- Make the Code: Use the same URL that you encoded onto your NFC chip and generate a high-quality QR code image. Consistency is key here.
- Print it on the Card: Design a clear, clean space on the back of your card (opposite the NFC chip, if possible) for this QR code.
- The Ultimate Backup: If the tap doesn’t work for some reason, a case, a poor signal, an older phone, the person can simply use their phone’s camera to scan the QR code. You’re guaranteeing a successful connection, which is, at the end of the day, the whole point of a business card. This simple redundancy transforms the card from a potential failure point into a universally compatible, smart networking tool.
Cost Analysis and Why Doing It Yourself is Smart
You might be asking yourself, “Why go through all this trouble when I can hire a professional?” As is often the case, the answer comes down to how much customization, the quantity you need, and, most importantly, how cost-effective it is.
A Comparison of Costs (Estimated US Dollar Costs)
| Component/Service | DIY Estimated Cost (Per Card) | Professional Service Estimated Cost (Per Card) | Key Benefit of DIY |
| NFC Tag (NTAG213/215) | $0.30 – $1.00 | Included, but factored into overhead. | Bulk Savings: Buying 50+ tags lowers the per-unit cost significantly. |
| Card Stock/PVC | $0.10 – $1.50 | Included (usually higher-end PVC or metal). | Material Choice: You control the card’s exact look and feel. |
| Printing & Labor | $0.10 (Ink/Toner) | $5.00 – $20.00+ | Free Labor: Your time is the only cost for design and assembly. |
| Programming | Free (Use of Free App) | Included in the service price. | Instant Changes: Reprogramming for a new URL is free and immediate (if unlocked). |
| Total Est. Cost | $0.50 – $2.60 | $10.00 – $30.00+ | Cost-Effectiveness for small-to-medium batches. |
Isn’t it clear? The biggest factor in the professional route is the labor and overhead of having them physically embed the chip and print the high-resolution design. For a small team or an individual professional who only needs a handful of cards, making them yourself can save you a ton of money. Plus, saying, “Yeah, I actually made this myself,” gives you a certain badge of honor and shows a level of tech-savviness that’s, well, a conversation starter on its own.
The Long-Term Effect: Why This is a Critical Upgrade
So, you spent some time and maybe a few dollars on your custom NFC business card. In the big picture of networking, what does this whole thing mean? It’s not just something new; it’s a fundamental change in strategy.
- Professional Image: Using this technology right away makes you look like someone who is forward-thinking, technically proficient, and, quite frankly, cares about the environment. You’re not giving out paper that gets thrown away; you’re facilitating a direct digital connection, which is a really strong, professional message to send.
- Data Integrity: Because the information is digital, it’s always saved perfectly. No more typos in an email address or missing numbers from a phone number when someone tries to type it into their contact list by hand; that whole manual entry error is simply eliminated. It’s a clean, accurate, and reliable transfer of data.
- Dynamic Updates: If you put a URL in a digital profile, the card is essentially “future-proof.” You don’t need to print new cards if you change your phone number, update your job title, or link to a brand-new website. Just change your online profile, and your old NFC card will automatically point to the new information. That is a huge financial and logistical benefit over regular cards that people often forget about; it makes this truly the last business card you’ll ever need.
Honestly, the DIY NFC card is much more than just a piece of plastic or paper; it’s a statement about your approach to networking: efficient, modern, and completely under your control. It’s an important addition to your professional toolkit, and one you can proudly say you built.
Do you want a simple list of recommended NFC chip types and where you might find them for purchase?